
Create a sandbox
Create a sandbox from the console by picking a template and resources, then manage its lifetime from the Sandboxes page.
Create a sandbox from the console in a few clicks: pick a template, choose the resources it gets, and it's ready to use.
Create one
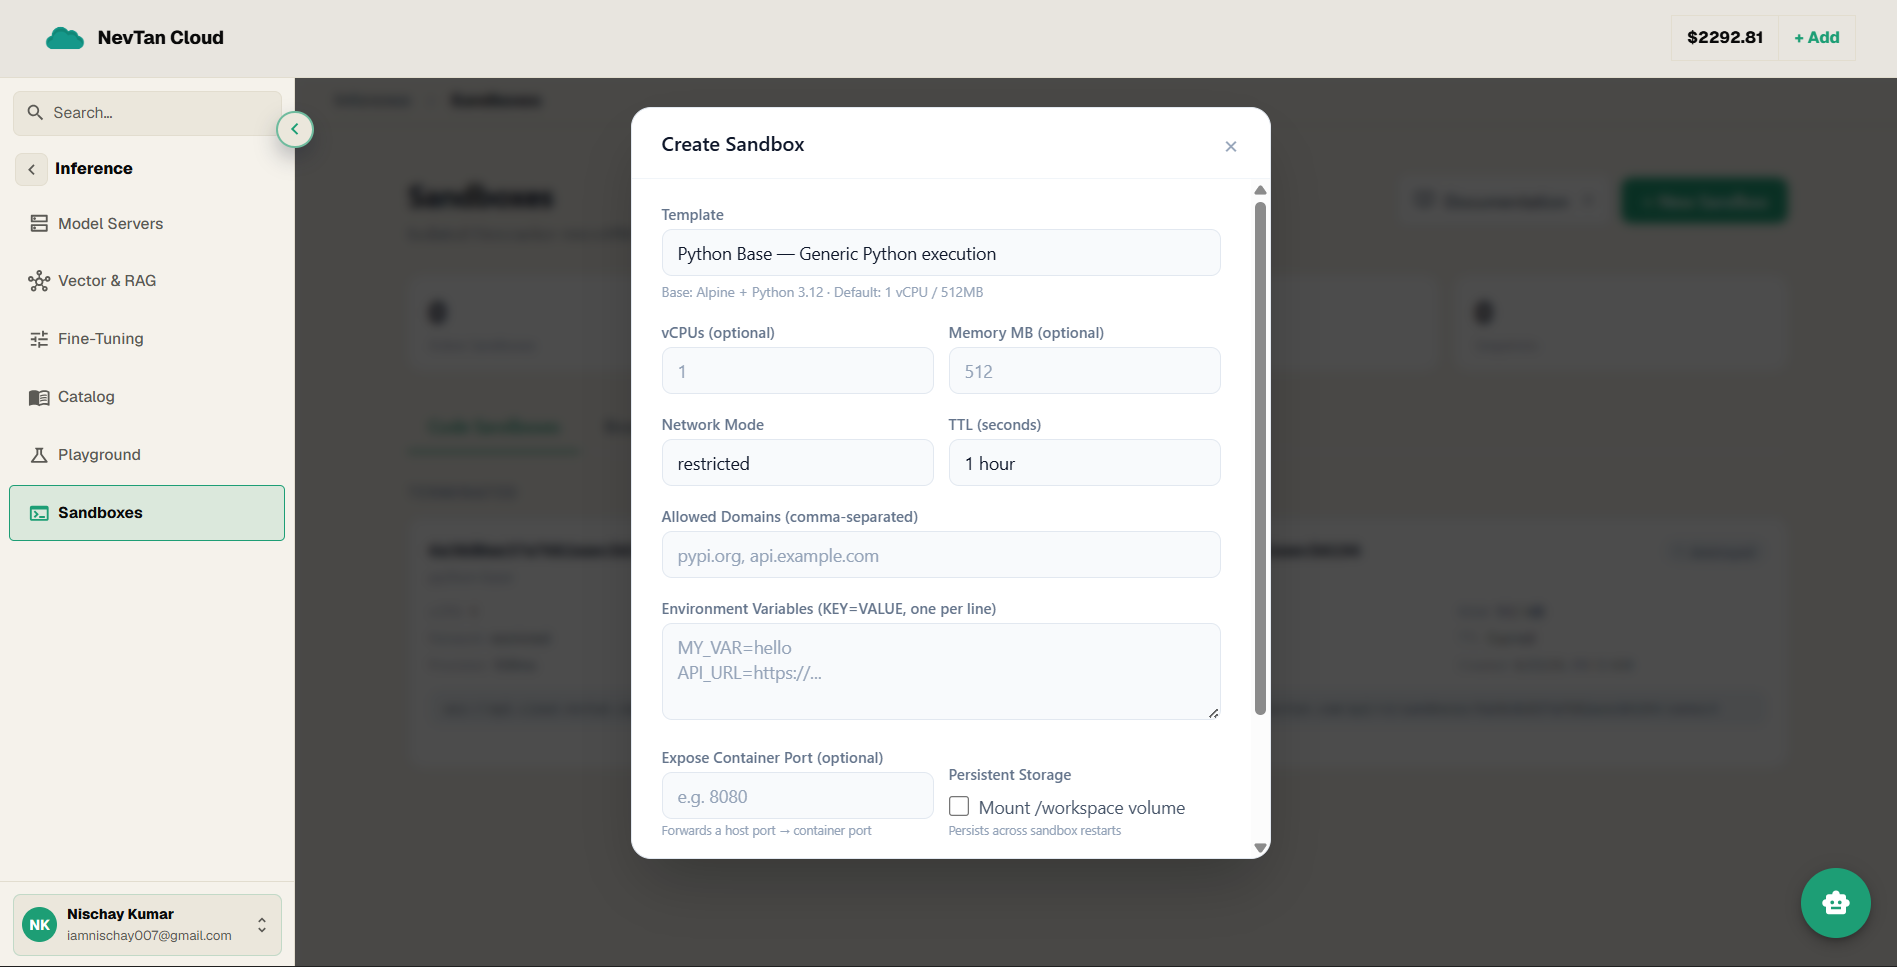
- 1Open SandboxesFrom the dashboard sidebar, open the Sandboxes page.
- 2Click New SandboxThis opens the create form.
- 3Pick a templateChoose a built-in template (Python, Node.js, Bash, LaTeX, AI Agent, Browser…) or one of your own custom templates as the starting image.
- 4Set resources and optionsChoose vCPUs and memory, a network mode and TTL, and optionally allowed domains, environment variables, an exposed port, and a persistent
/workspacevolume. - 5CreateClick Create. The sandbox boots immediately and opens to its console — no waiting on a separate provisioning step. A cost estimate (billed per hour from your credits) is shown before you launch.
| Parameter | Type | Description |
|---|---|---|
Templaterequired | select | The starting image — a built-in template or one of your own. See Templates. |
vCPUs / Memory MB | number | CPU and memory allotted to the sandbox. Defaults to 1 vCPU / 512 MB. |
Network Mode | select | restricted (default), full (open egress), proxied (routed through a proxy), or none (no network). |
TTL | select | How long the sandbox lives before it is reclaimed — 15 min, 30 min, 1 hour, 2 hours, or 24 hours. |
Allowed Domains | text | Comma-separated domains the sandbox may reach — pairs with a restricted network mode. |
Environment Variables | text | KEY=VALUE pairs, one per line, injected into the sandbox. |
Expose Container Port | number | Optionally forward a host port to a container port, to reach a server running inside the sandbox. |
Persistent Storage | toggle | Mount a /workspace volume that persists across sandbox restarts. |
What resources and lifetime actually mean
These two choices are about matching the sandbox to the job, not about picking the biggest option by default:
- Resources — a small CPU/memory allotment is plenty for trying a snippet or poking at a small script. Reach for more when the job is heavier: processing a large dataset, running a memory-hungry library, or compiling something. Under-provisioning shows up as slow runs or out-of-memory errors, not a hard block, so it's easy to bump up and recreate if a job turns out bigger than expected.
- Lifetime — a short lifetime is fine for a quick, one-off check you'll finish in the same sitting. Set a longer lifetime for something you're actively coming back to over a few days, so it isn't reclaimed between sessions. Either way, Extend is always available if you're not done yet, and a snapshot protects the state if you're not sure you'll get back to it in time.
Start from a snapshot instead
Instead of a template, you can start a new sandbox from an earlier snapshot — it boots with the same files and setup already in place, so you skip redoing any setup work.
Managing existing sandboxes
The Sandboxes page lists every sandbox you've created with its status. Open one to use it, or click Extend to keep it alive longer, or Delete to remove it immediately.
Tip
Deleting a sandbox removes its files right away. If you might want that state again, take a snapshot first.