
Dockerfile
Use the auto-generated Dockerfile or provide your own, and view, save, or reset it per project.
Every project builds from a Dockerfile. No repo Dockerfile? NevTan generates one for the detected framework — inspect it, edit it, or reset anytime, right from the console.
Auto-generated vs custom
- Auto-generated — written automatically for the detected framework. A good default for most apps.
- Custom — edit it to control the base image, build steps, and runtime exactly. Saved edits apply to every subsequent build.
- Reset — drop your custom Dockerfile to fall back to the generated one.
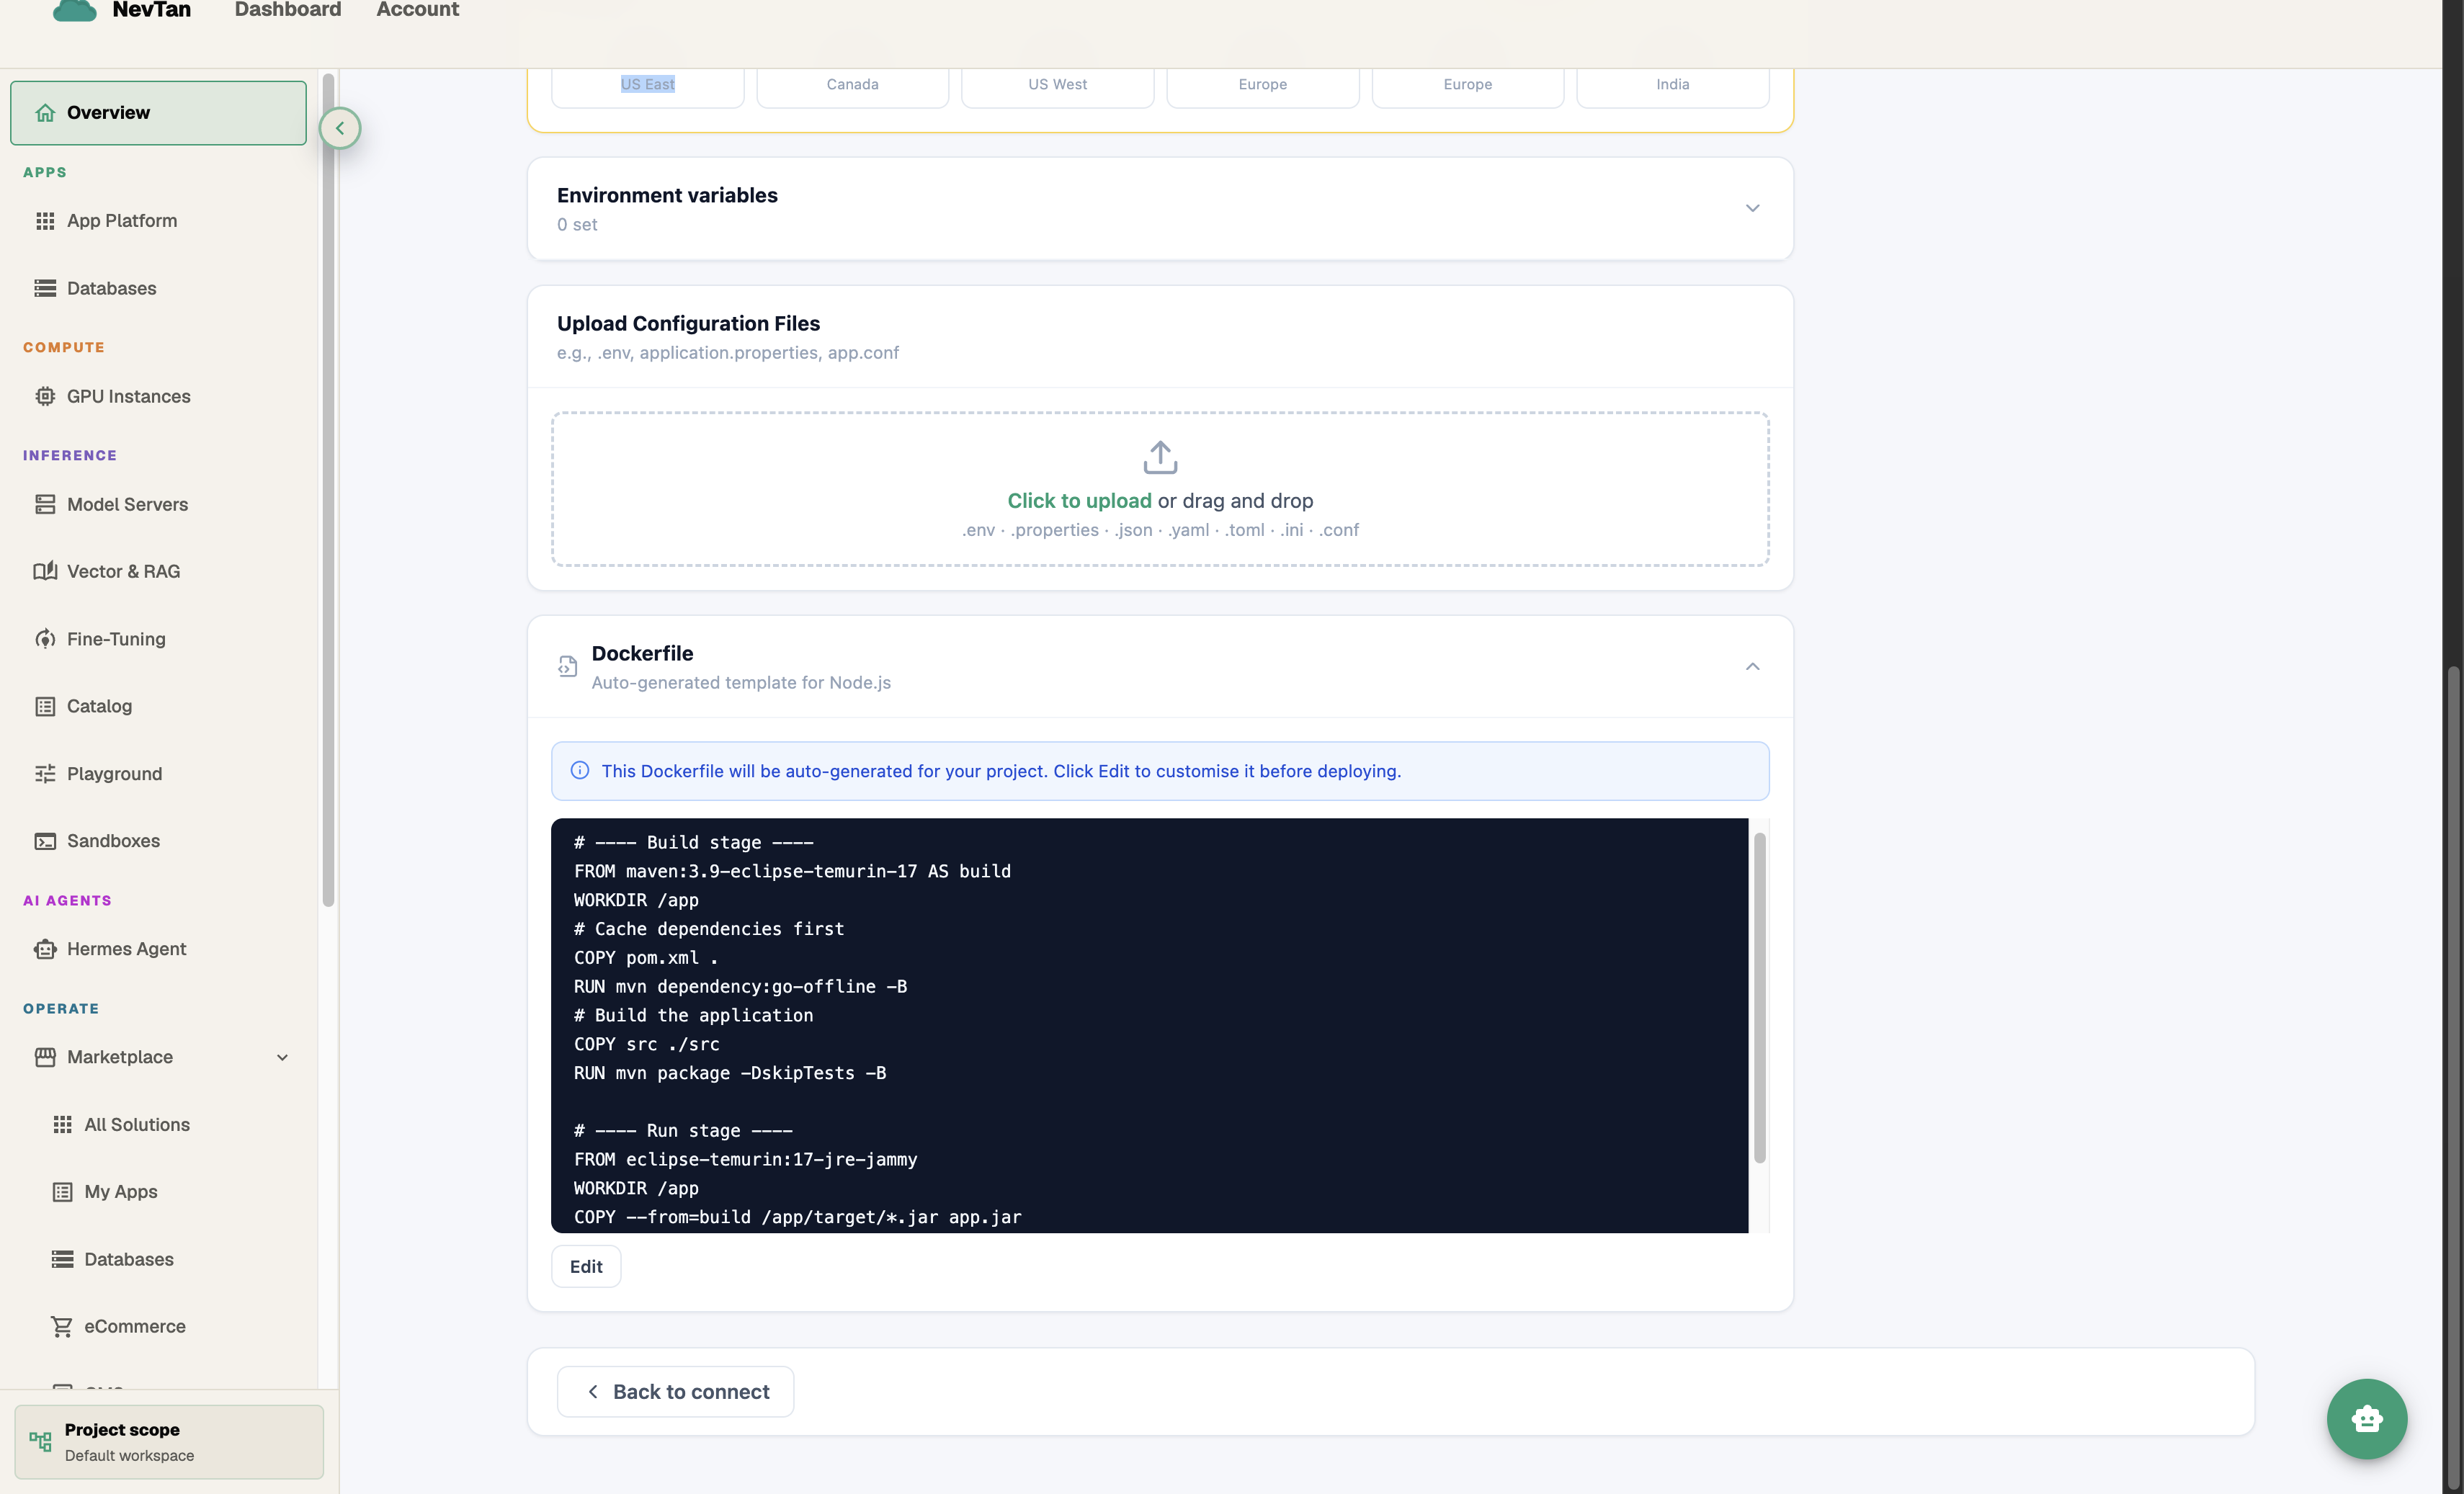
Where to find it
The Dockerfile lives inside the Configure screen (opened from the project's action bar), below the build/run command and environment variable settings — not as its own separate tab.
View and edit
- 1Open ConfigureFrom the project page, click Configure. Scroll to the collapsible Dockerfile section — its header shows either "Custom Dockerfile" or "Auto-generated — click Edit to customise".
- 2Click EditThe pencil-icon Edit button switches the viewer into a writable code editor.
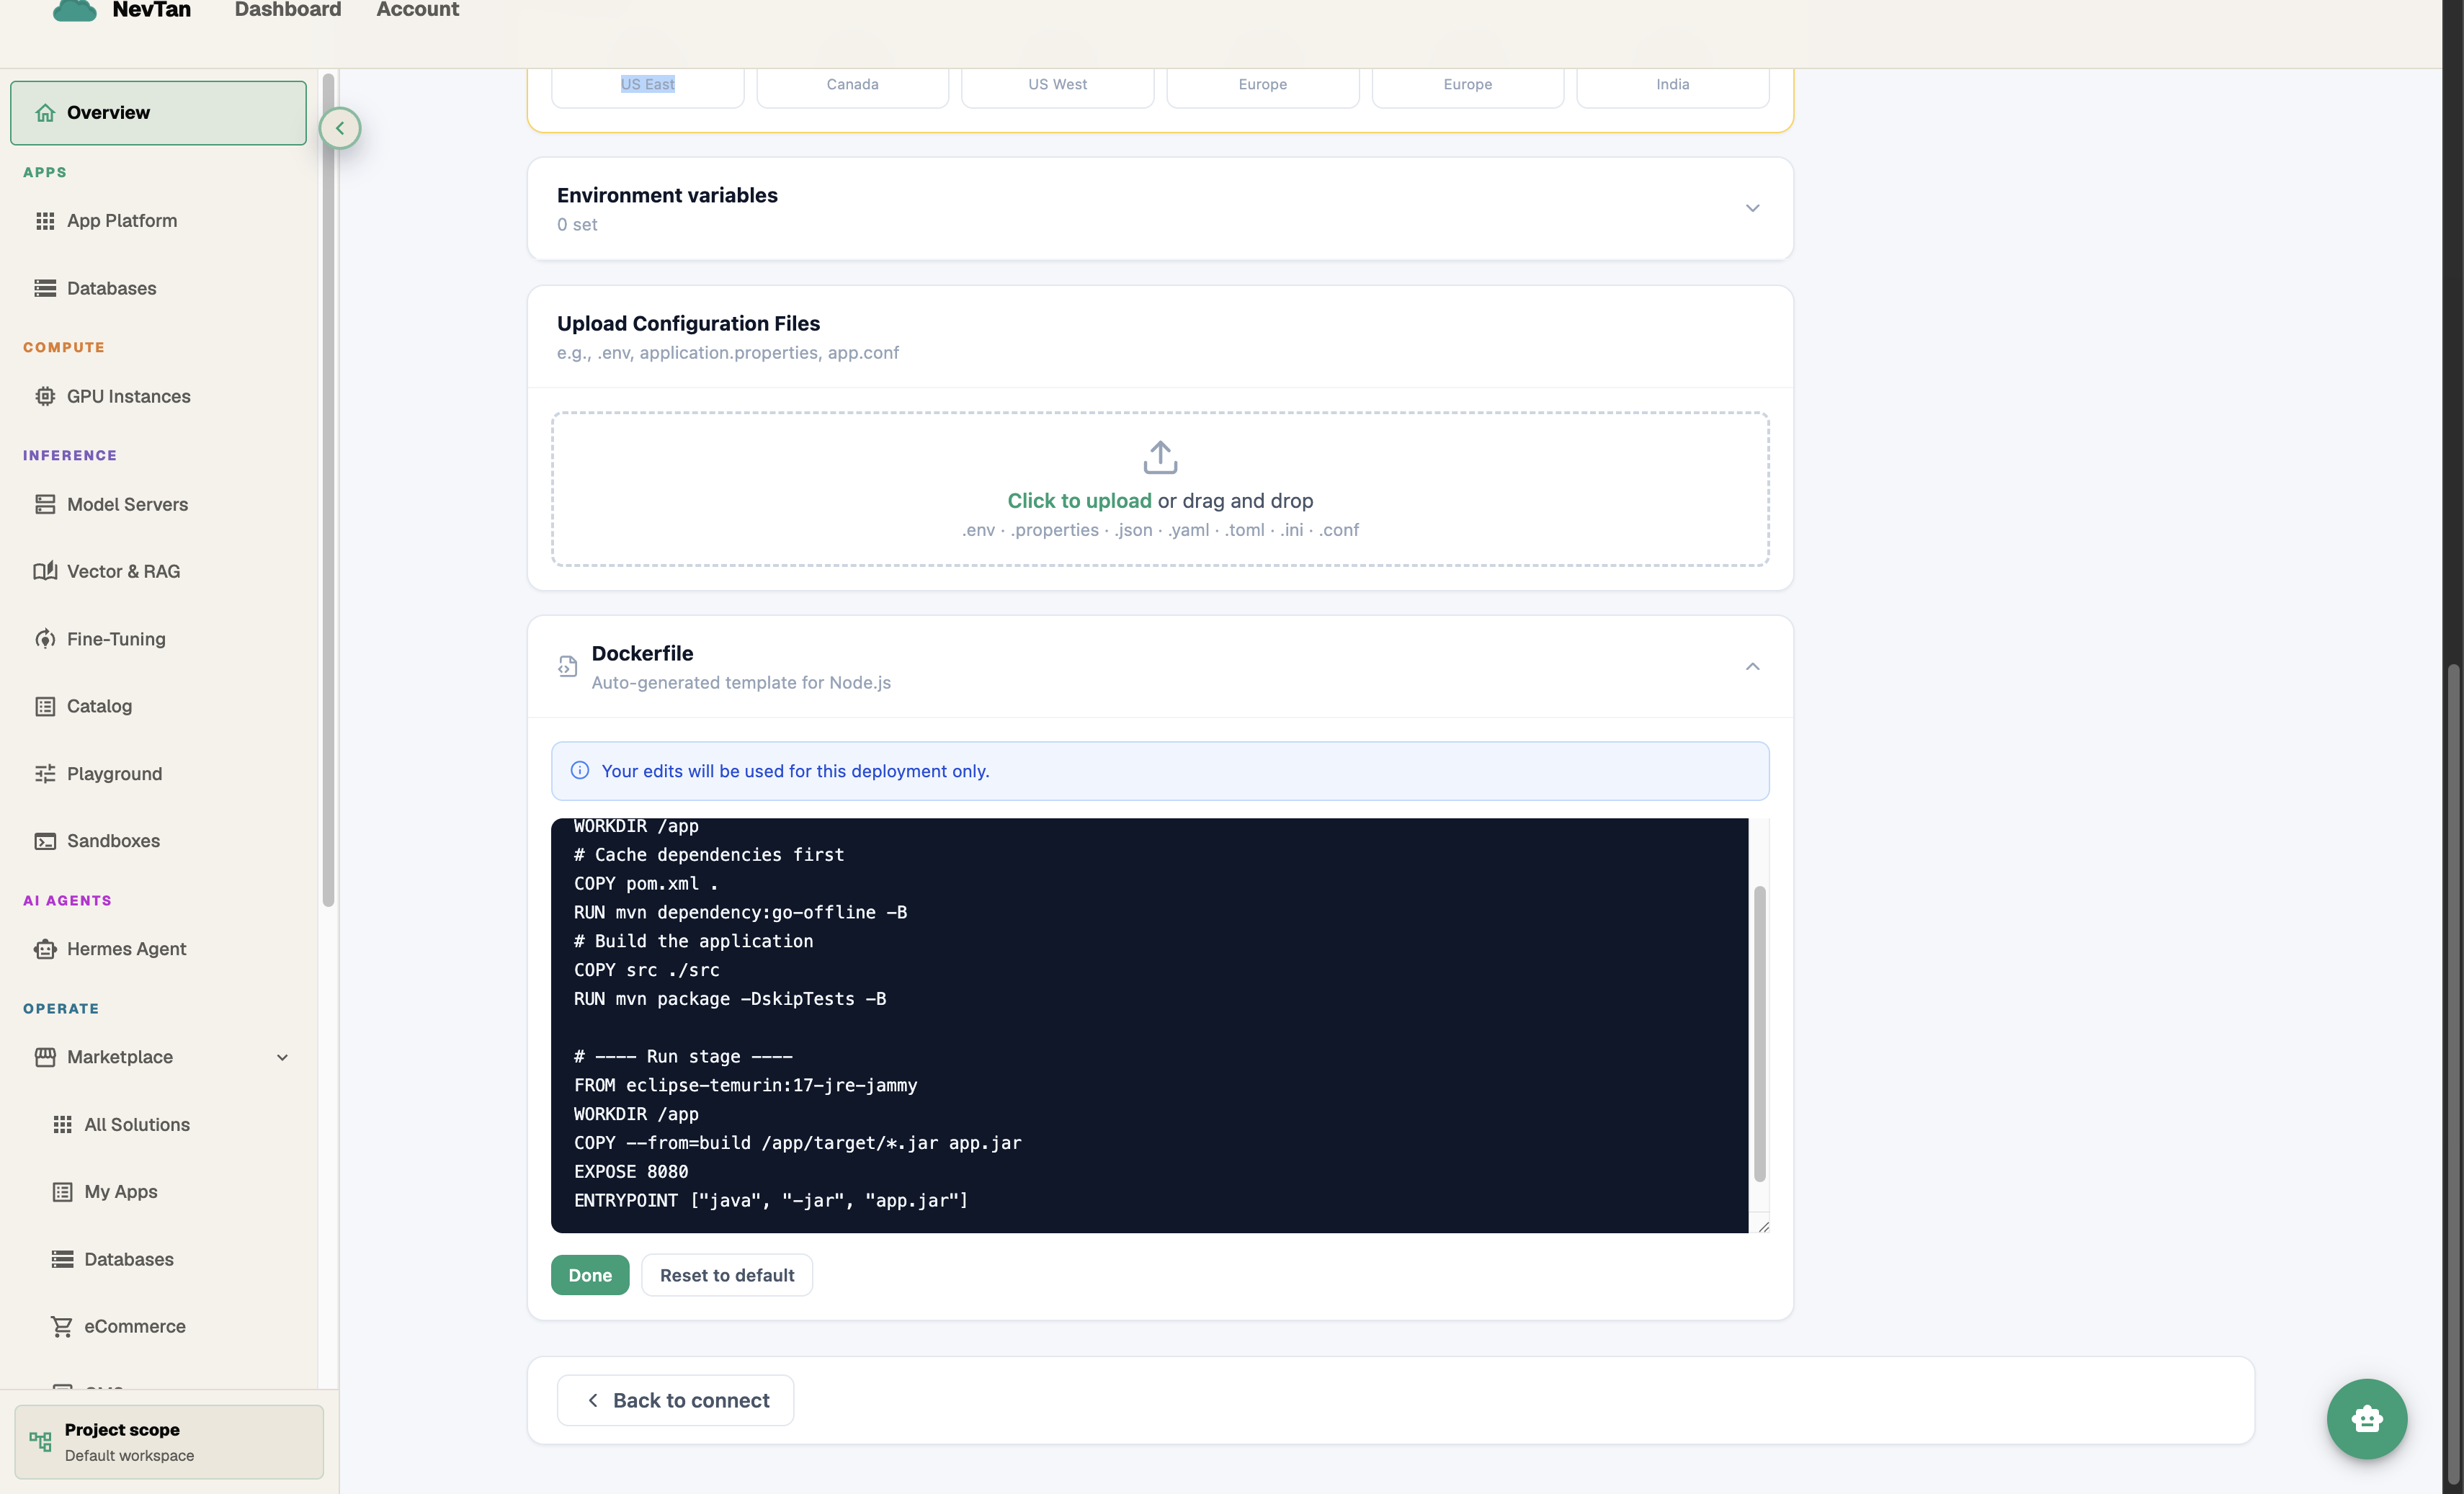
Edit inline, then Save or Cancel. - 3Make your changes, then Save or CancelSave stores your edits with a confirmation toast; Cancel discards them and keeps the previous version.
- 4Redeploy to apply itA saved Dockerfile does not restart your running container by itself — the note under the editor says exactly this: changes apply on the next redeploy, not immediately.
Reset to the generated default
Once you've saved a custom Dockerfile, an amber Reset to default button appears next to Edit. Click it to drop your custom file and fall back to the auto-generated one for your detected stack — then redeploy to apply it.