
Deploy an agent
Browse agent types, fill in the deploy form, and see your running agents in the console.
Deploying an agent is a short flow in the console: pick a type (the Hermes Agent or OpenClaw), choose a plan, then fill in an admin account, your AI provider, and a few settings. Channels are connected afterward, from the agent's own dashboard.
Browse agent types
Open AI Agents in the sidebar to see the available agent types. Click a type to open its product page — the channels, models, and features it supports — before you commit to a plan. For a full worked example, see the Hermes Agent guide.
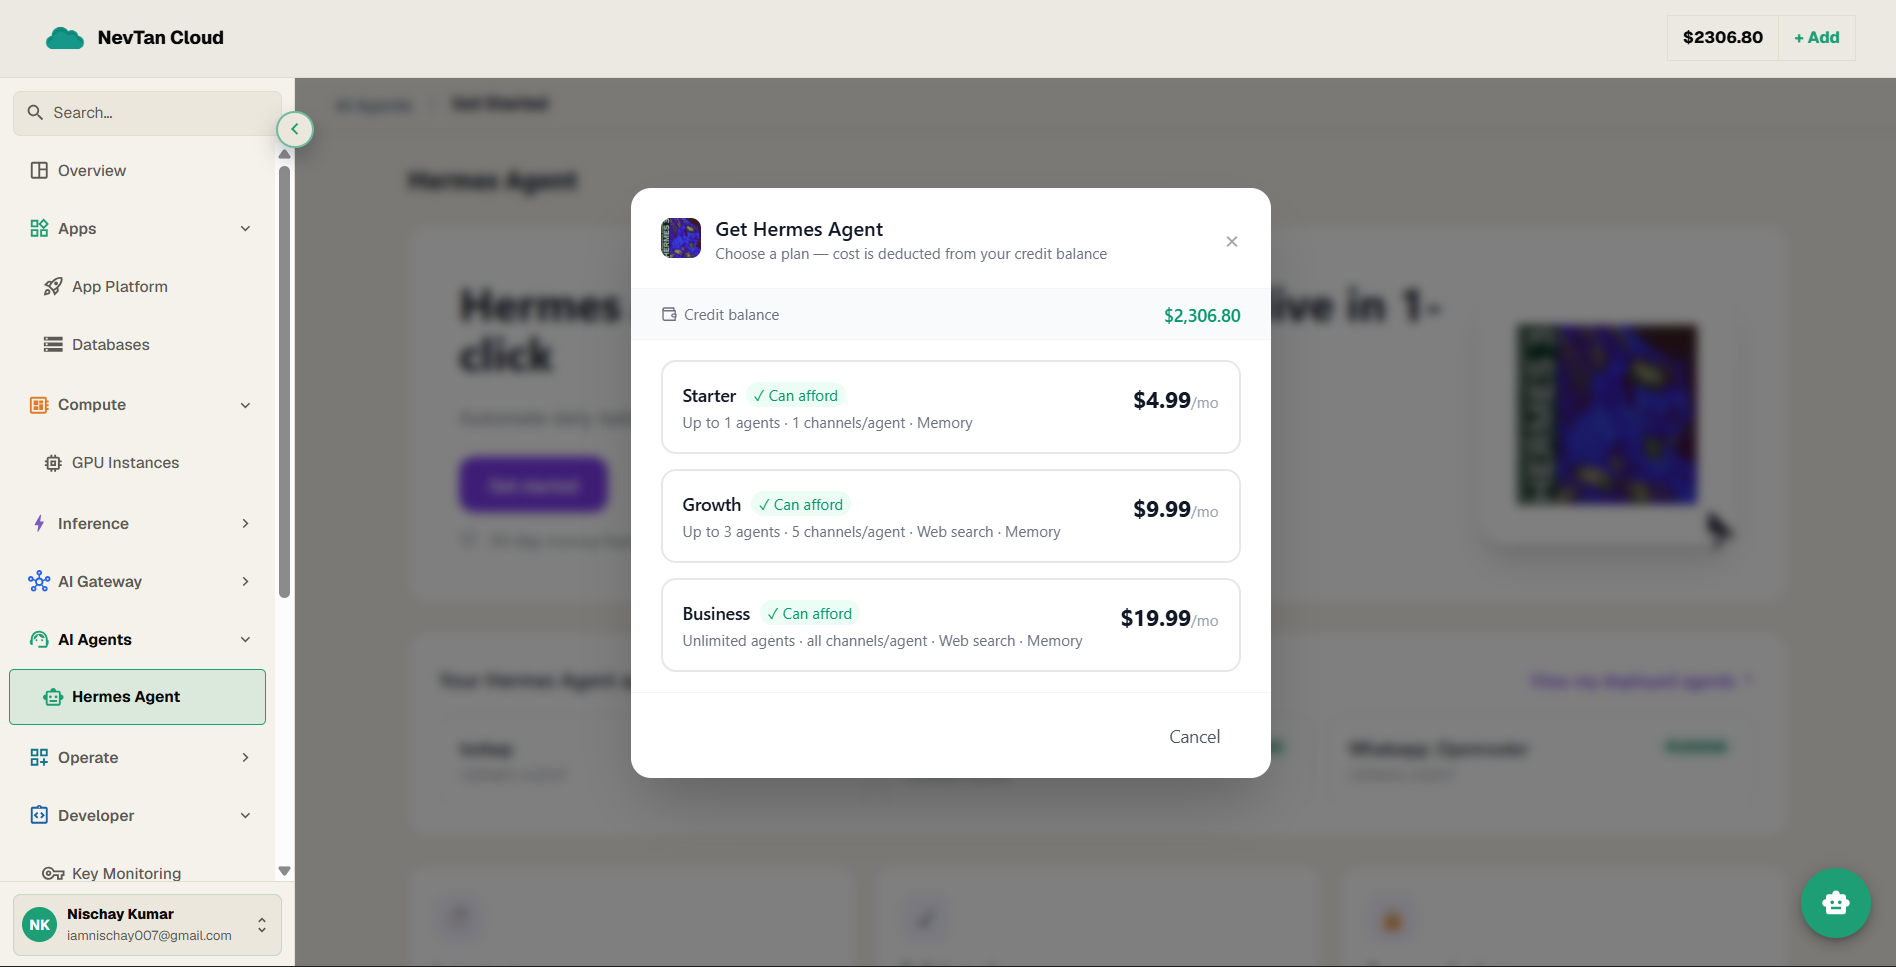
Step 1 — Pick a plan
Click Deploy Agent and choose a plan (Starter, Growth, or Business). Your credit balance is shown and checked here — if it is short, you are prompted to add credits before continuing.
Step 2 — Fill in the deploy form
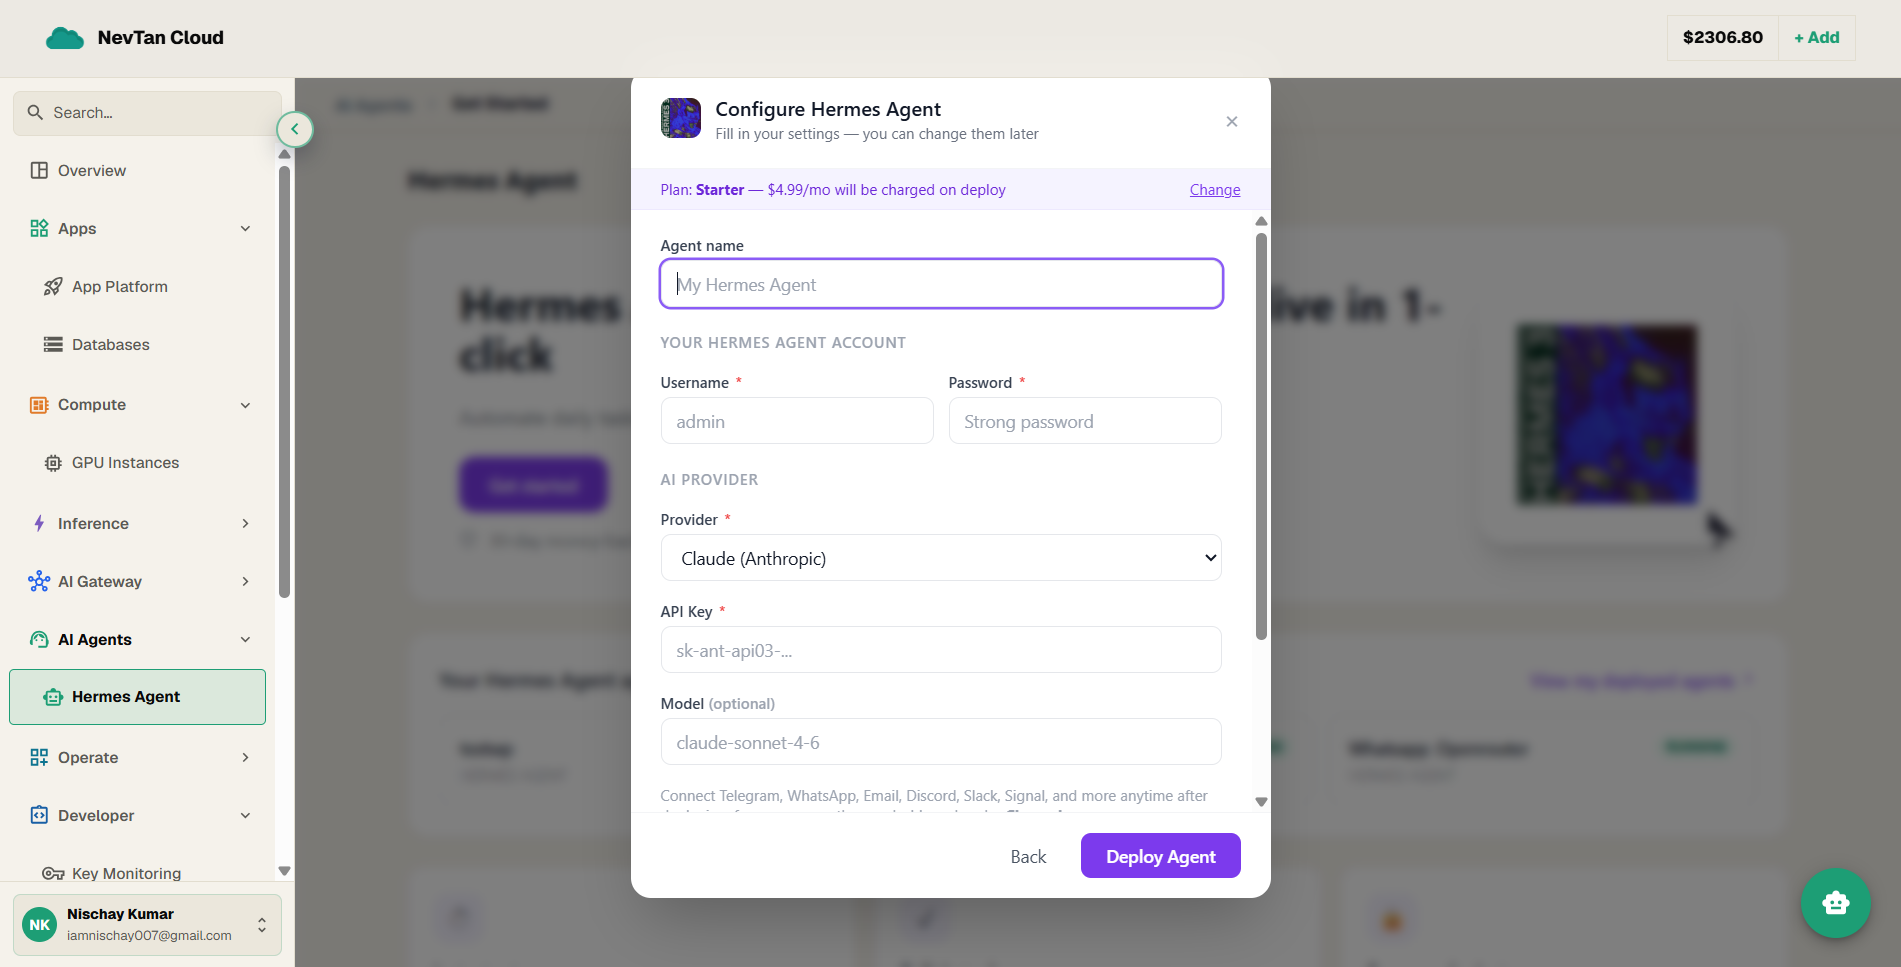
Next, configure the agent. Note there is no channel step here — channels are connected after deploying (Step 4).
| Parameter | Type | Description |
|---|---|---|
Agent name | text | A label for the agent, e.g. "Support bot". Defaults to "My <agent> Agent". |
Admin Usernamerequired | text | Login username for the agent's own dashboard (where channels are connected), separate from your NevTan account. |
Admin Passwordrequired | password | Password for that dashboard login. |
Providerrequired | select | The AI provider the agent uses — Claude (Anthropic), ChatGPT (OpenAI), Gemini (Google), OpenRouter, or a local Ollama. |
API Keyrequired | password | Your key for the chosen provider (not required for Ollama, which takes a base URL instead). |
Model | text | A specific model id; leave blank for the provider default. |
Timezone | select | The timezone the agent operates in. Defaults to UTC. |
Persistent memory | toggle | On by default — lets the agent recall earlier messages in a conversation. |
Web search | toggle | Off by default; available on plans that include it. |
Step 3 — Deploy
Click Deploy Agent. The agent is created immediately — there is no separate "start" step.
Step 4 — Connect a channel to activate it
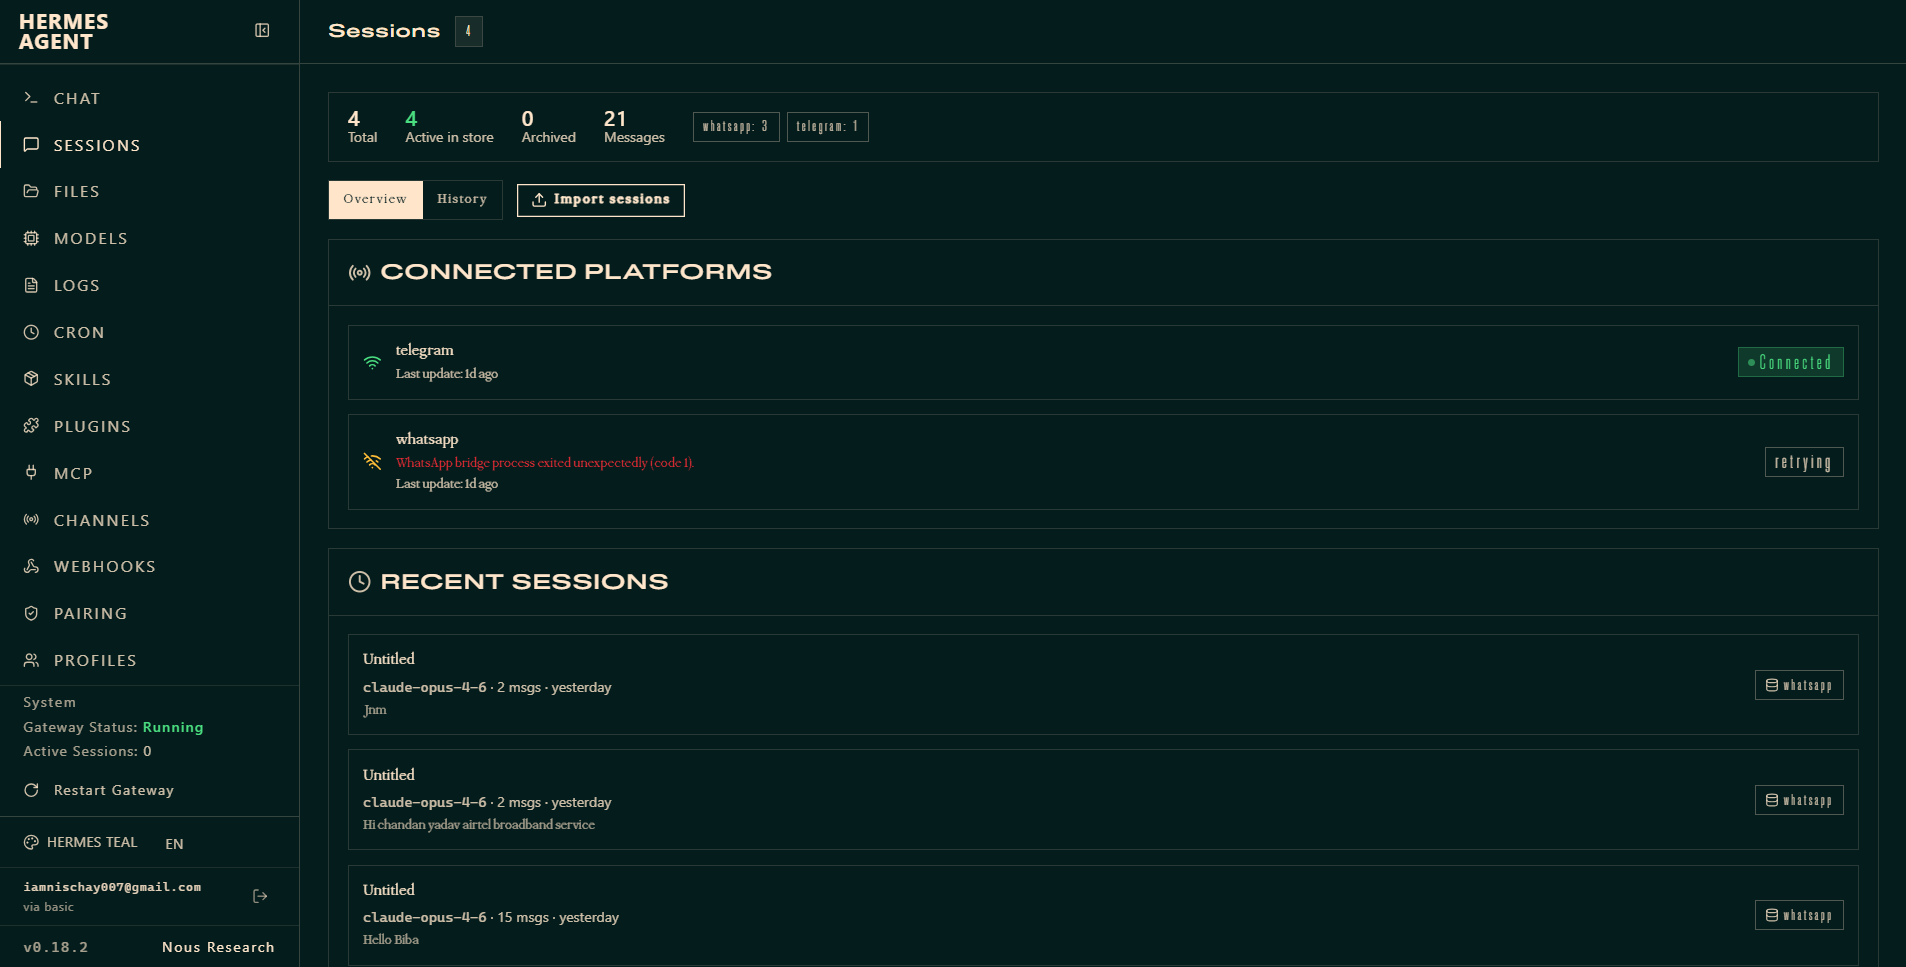
A freshly deployed agent is idle until it has a channel. Log into the agent's own dashboard with the admin username and password you set in Step 2, open Channels, and connect at least one channel by pasting its credential (for example a Telegram bot token). The agent can now receive and answer messages.
What a realistic deploy looks like
Say you're standing up a support bot for a small store. You open AI Agents, click into the Hermes Agent product page to confirm it supports WhatsApp, and click Deploy Agent. You choose the Growth plan, name it "Support bot", set an admin username and password, pick your AI provider and paste its API key, leave web search off since order lookups don't need it, and turn memory on so a customer doesn't repeat themselves across messages. Clicking Deploy creates the agent immediately. Finally you open the agent's own dashboard, go to Channels, and paste in the WhatsApp Business API token you already have — that's what brings it online.
Your running agents
The AI Agents list shows every agent you've deployed, its type, plan, and current status. Click into any agent to open its configuration, logs, and activity.